Tips for Makers: You Can Fake it When you Make it Part 3, “Plastic is Your Pal”

Plastic is an incredibly versatile material and it is everywhere. With a little ingenuity and elbow grease you can make it into just about anything.
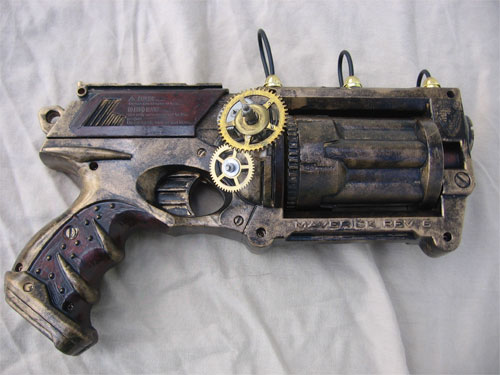 First off, there are toys. At any Steampunk cosplay event you can be sure you will see souped up Nerf guns and squirt guns that look like they walked right out of an H. G. Wells story. But keep in mind that if you want to paint a plastic gun that spray paint will chip over time. If you scour your plastic surface ahead of time with steel wool, sand paper or even a kitchen scouring pad you will create pores for the paint to adhere to and it will last much longer. Kinex is a line of plastic engineering toys so it is a great way to get lightweight and cheap plastic gears that you can paint to look like metal.
At the Form and Function session at The Asylum one of my favorite items was a remote-control Dalek toy that a maker Steampunked by adding metallic paint and little makeshift boiler on the back.

Major Quicksilver Power Glove
Plastic pipes like the ones you can find at the hardware store are also really useful. Just like plastic guns, they need to be roughed up before you paint them, but they are relatively easy to drill into with a small electric drill so they are easy to embellish. Major Quicksilver had an amazing “power glove” that he built by attaching a leather work glove to the interior so the fingers were flexible even though the gauntlet was rigid. It was enhanced by flexible plastic tubing and a leather strap that attaches to the upper arm.
You can also get the look of rivets without having to use real metal. If you search for “half pearls” on eBay you can find these great little half-spheres that look just like metal rivets, sometimes without having to paint them. The Major warns that you can find one with adhesive on the backs, but they are much more expensive than getting the kind you glue on yourself. And if you are attaching them to EVA foam hot glue will hold them on really well. An audience member also mentioned that dried peas or lentils can also do for rivets in a pinch, as long as you don’t mind a little irregularity in the shape.

Quicksilver flexible hand
Another great use for plastic is if you have to make something hinged. Sure, you can use real metal hinges that require screws but if you want a quick and easy hinge you can just cut plastic packaging like the top from a butter tub or the like into strips. Attach one end of each strip to the pieces you want to hinge and you will have a flexible and lightweight connection. The amazing giant hand at right had metal hinges on one side and plastic on the other. He was able to manipulate the fingers by pulling strings attached to a leather glove on the other side. In case you are thinking of doing something similar, he let us know that the thumb was the most difficult part to get to move, so he used his pinky finger instead, ergo the three-fingered hand.
The good Major also told the crowd all about a wonderful malleable plastic called polymorph. It comes in the form of little beads and you can melt them in boiling water on your stove. After they become gel-like and come together in a glob you have about 5 minutes to mold it into any shape you want. And if you don’t like the result you can just put it back into the hot water and start again. Of course, you have to be careful about burning yourself when you take the polymorph out, so if you use something like welders gloves it will protect your hands. It usually comes as a transparent plastic, but you can add dyes or paint it later. Once it is solid it is a great material to drill into or file.
If you want an antiqued look to your paint jobs you can use a dry brushing technique. This is done as the second layer to add a bit of a weathered look to your surfaces. For instance, if you are trying to get the look of copper armor that has begun to oxidize, you should start with a solid layer of copper paint before you add the touch of turquoise to make it look tarnished. To dry-brush, add a glob of paint to your brush (this is a good use for old brushes) and remove most of the paint on a newspaper, magazine, etc. Even if you remove most of the paint there will still be just a bit left on the bristles, and you can apply this to your finished project.
Do you have any suggestions for working with plastic? Please comment below!
For more tips about creatively cutting corners, you can check out parts 1 and 2 of this series.
Tips for Makers: You Can Fake it When you Make it Part 2, “Foam is Your Friend”


Quicksilver’s table-o-goodies
During the “Creating with Quicksilver” session, the Major couldn’t say enough good things about a material called Ethylene Vinyl Acetate (EVA) foam. My only experience with it has been with bedrolls and yoga mats, but he demonstrated several ways to use it when you are constructing costumes.
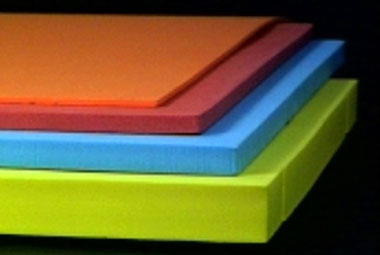 EVA foam comes and many different colors and thicknesses. There are floor mats that are popular for kids to play on and these often have texture on one side which can add interest. Unlike many plastics, this foam also readily takes to hot glue without extra treatment. It is easy to draw on it with permanent markers, and can be cut with scissors or for more accuracy, a craft knife. It will dull your blade pretty quickly, though, so if you plan to make repeated cuts it is a good idea to invest in a craft knife that allows you the change out the blade easily.
If you do end up with rough edges you have a couple options. You can use something like a Dremel or other electric tool to grind them down, but it will be very messy when the foam starts flying. Major Quicksilver advises running the blunt side of a scissors across any rough parts to smooth it down without the mess.
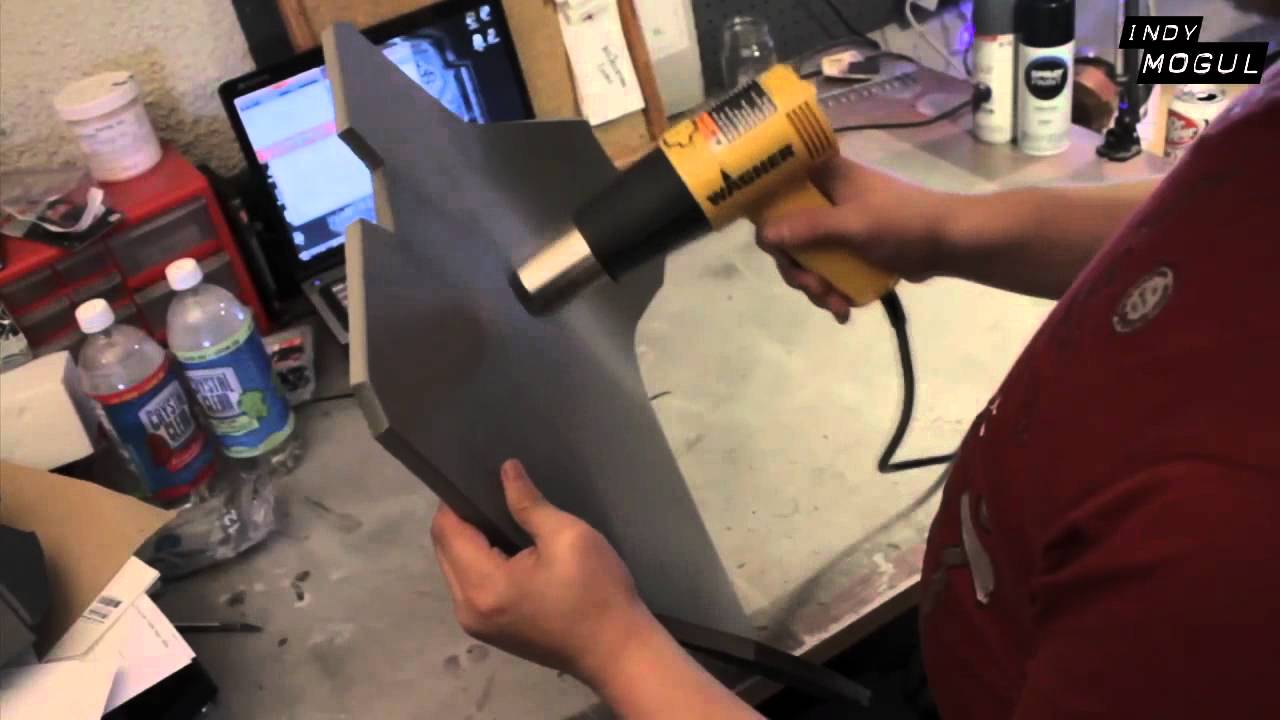 EVA is especially good for things like armor that need to look heavy and sturdy but you don’t want to weigh you down. There are tons of patterns out there on the web for different kinds of armor, and the foam is great for layering so you can add bulk to your character easily. It is also easy to mold when heated with a heat gun, or even a hairdryer and holds it shape like a dream.
There are some foams, like polystyrene, which are even lighter and readily available, but be advised that there is often a chemical reaction with certain paints that can actually melt the foam. It would be a shame to build a whole suit of armor just to have it disintegrate while you are adding the finishing touches! EVA, on the other hand, is great for painting, especially with spray paint. But beware that the more a part of your project has to bend the more likely it is that your paint job could crack and flake.
Here are a few Steampunk examples I found on the web to inspire your own creations.


Get Ready to Celebrate Halloween all Month Long with ForWhomTheGearTurns!


model: Candace Miller Photographer: Richard Fournier
That’s right folks, it’s time for a monster mash. One popular way to “punk your steam” is to add elements of the supernatural to the tales from history, offering explanations that incorporate ghouls such as vampires and werewolves rather than what the history books say, as well creating brand new narratives where monsters play a role. Also, the Victorian era saw the birth of Spiritualism, the belief that spirits of the dead could and often did communicate with the living. All Hallows Eve, which has now been shortened to Halloween, celebrates the creepy and costume, and Steampunk seamstresses and seamsters, make-up artists and makers the world over use it as a chance to showcase their talents and share their knowledge.
1872
Halloween has always held a special place in my heart, and in fact I launched this blog on October 31, 2013, so October is also my countdown the my first blogging birthday. Join me all month long for reviews of Steampunk movies and books that feature monsters and witches, costume construction tips from the sessions I attended at Weekend at the Asylum, LARP-ing games to give you an excuse to dust off your costume early, and other spooky fun surrounding the history of ghost stories and the practices of Spiritualism.
Do you have a scary or supernatural Steampunk story or photos of your Halloween creations that you would like to see appear on this blog? Send them my way at ForWhomTheGearTurns@Gmail.com. I can’t guarantee that I will post everything I receive, but I would love to get some submissions from readers. Make sure that you include the name you would like your creation attributed to as part of your email.
Weekend at the Asylum: The Markets

Europe’s largest Steampunk convivial was the host to several markets and tons of talented traders and craftspeople. There was one open to the general public in Castle Square, but the rest were only available to convention attendees. It was fun to be at the open market because of the opportunity to see all the “normals” mixing with the Steampunk crowd, but the closed markets were a great opportunity to visit booth after booth without being overcrowded.
I got a chance to talk to lots of people and collect several business cards, so I will do some posts on individual folks and businesses where you can get some stuff to add extra steam to your own cosplay. For now, here are some pics of the general hub-bub and the kinds of things you could purchase as part of the convention. Even with the pounds to dollars conversion I found the prices for vintage and handmade goods to be very reasonable. I picked up a utility belt, some art supplies and lovely lace collar for less than 50 GBP total.


Victoria and Albert Museum Part 2: The Clothes

The primary reason I wanted to visit the Victoria and Albert Museum was because I heard about the amazing displays of fashion through the ages. There is a really great circular gallery with men’s and women’s clothing, and right now there is also an exhibit on wedding dresses, though that has an extra charge where the rest of the museum is free. It would be a great place to do research for costumes, both to get visual inspiration as well as great background info. My best pictures were mostly of dresses, but there are lots of great suits, boots and hats for the menfolk as well.


Cosplay at the Asylum: The Costume Contest

 You should have been there. The buzz in the ballroom was happy and excited as the DIY models assembled to strut their stuff for a very appreciative audience. I had hoped to get a seat at the end of the runway, but even 10 minutes before the show started it was difficult to find any empty floor space at all, so I had to settle for sitting on the floor seat near the stage. I hope you enjoy the gallery of photos as much as I enjoyed being there, and I also got a chance to shoot a quick video of the models’ final procession right before the judges made their decision.


Cosplay at the Asylum: Out and About

There were so many wonderful costumes during Weekend at the Asylum, so I decided to keep the costume contest participants for another post. Here are some delightful folks from around the convention.


")


