Music to Steampunk By: Emperor Norton’s Stationary Marching Band

“Emperor Norton’s Stationary Marching Band combines the rich musical history of the circus and the vagabond peoples of Europe with the raw energy of avant-garde jazz, the burning heat of funk and the irreverence and fun of today’s Vaudeville for a sound that is somehow familiar yet like no other. Label them anyway you like! Call them avant world fusion, call them experimental big band, call them gypsy steamfunk, call them circus noise! They may be tough to sum up, but it’s easy to tell you they’ll show you a good time and they’ll get a crowd dancing!” Read more
You can catch their next show on March 16 at the Steampunk World’s Fair in New Jersey!
The Pandora Society » The Symposium Ambassador Program


A great opportunity and discount for people planning ahead for the 2016 International Steampunk Symposium in Cincinnati. I’ve already got my room reserved! Will I see any of you there?
Spotlight on Traders: Empire Edibles

I had a wonderful time talking to traders like Claire “Skip” Peacey (pictured below) and giving out bumper stickers at the 2014 Weekend at the Asylum, and I am planning to do more of these spotlights like the one I did for Doctor Geof earlier this year.

Empire Edibles stall at the Castle Market
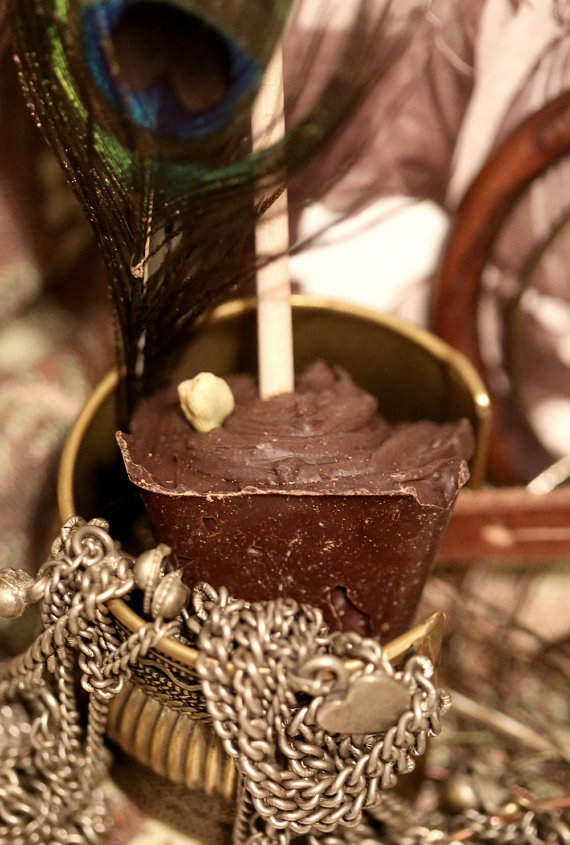 Our steamy business this time is all about delicious food. As you can see, this booth featured beautifully packaged goodies with a Victorian theme. Flavors like absinthe and rose are front in center in a variety of chocolates and cookies, and Steampunk author Kit Cox (aka Major Jack Union) helped Miss Emily Ladybird to design the packaging and presentation. If you are planning a Steampunk event in the UK, or you need something special for a wedding, you should definitely keep Empire Edibles in mind.
Links:
Empire Edibles official site There is a note on the homepage that says the website is being revamped, but there is lots of information there in the meantime.
My Entries into the Indiana and Kentucky Steampunk Societies’ Pin Contest


 I found out from following the Pandora Society that both the Indiana and Kentucky Steampunk Societies are having a competition this month. Both states are looking for new designs for pins based on each one’s state seal. I am pretty clumsy in the Adobe design suite, but overall I am quite pleased with what I could do.
Above is my submission for Indiana, which substitutes a teacup-wielding robot arm for a torch and gears for stars (source material at left). The Kentucky design is below, and I decided to focus on the motto, “United We Stand, Divided We Fall” rather than the picture on the seal. I was hoping to capture a “Writers and Makers Unite!” sort of vibe. What do you think?
The prize is free admission to either the 2015 or 2016 International Steampunk Symposium, which is held in Cincinnati annually. I am already planning my visit in 2016, and getting to contribute to the Midwest Steampunk efforts would be icing on the cake.
In order to enter I have to post my design on my own site, but voting doesn’t start until Feb. 17 so I’ll let you know how to cast your ballot for my designs once voting commences. Want to try yourself? Here are the details.

Wish me luck!
Music to Steampunk by: Frenchy and the Punk

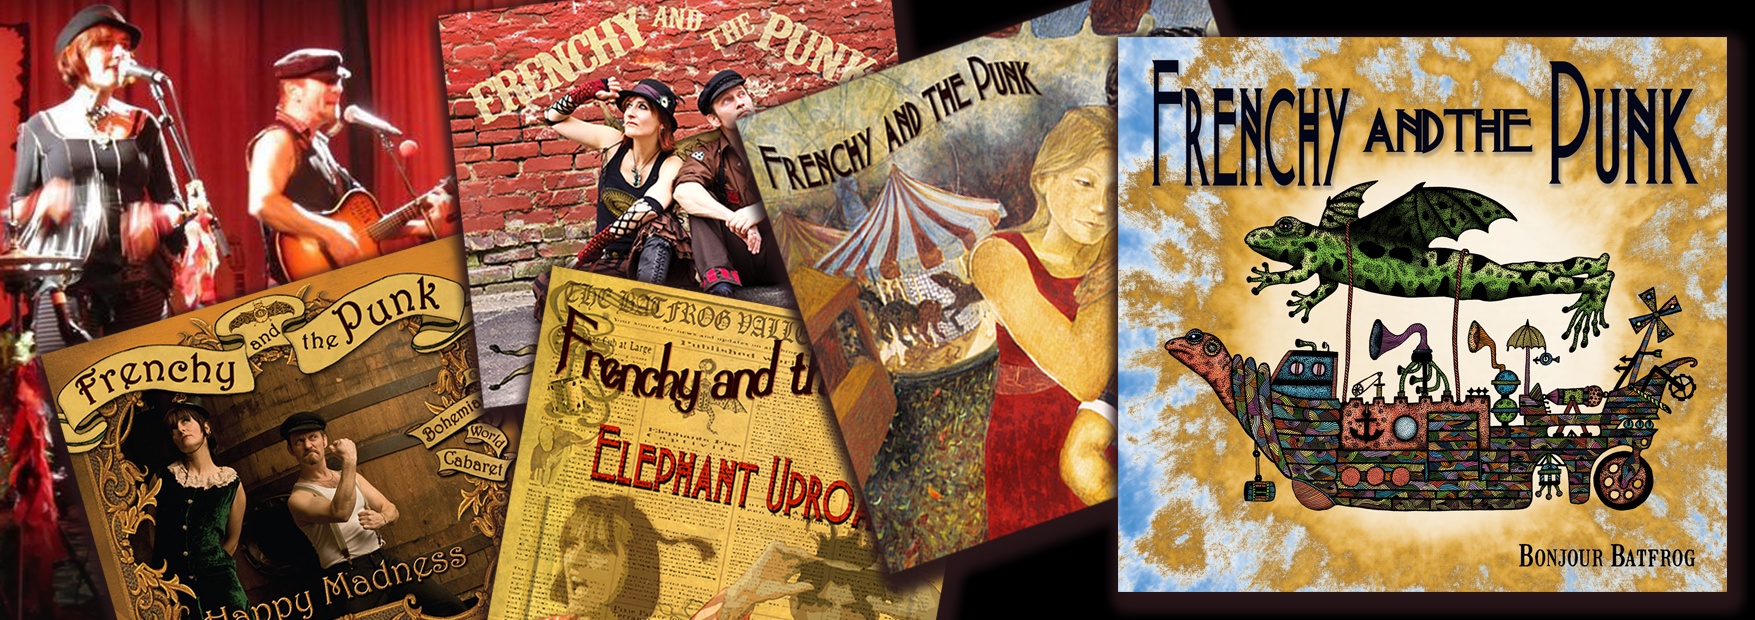
I missed my chance to see the Frenchy and the Punk performance during Weekend at the Asylum, but I’m not going to miss sharing this dynamic duo with you! “Frenchy” (Samantha Stephenson) was on the panel for the Steampunk on the International Scene session at the con, and she shared that though she and “The Punk” (Scott Helland) hadn’t necessarily set out to be a Steampunk band, the way to community had embraced them was amazing and she was so thankful to be doing what she loves for an appreciative audience.
This “Folk Punk Cabaret” band is currently touring in the US, so if you are lucky you might get to see them this Spring.
Upcoming Tour Dates
Jan 16-18 HRM Steampunk Symposium @ Queen Mary, Long Beach, CA
Jan 22 Pond 5, New York, NY
March 6-8 Wild Wild West Steampunk Con, Old Tucson, AZ
Apr 24-26 International Steampunk Symposium, Cincinnati, OH
May 15-17 Steampunk World’s Fair, New Jersey
Spotlight on Traders: Island of Dr. Geof

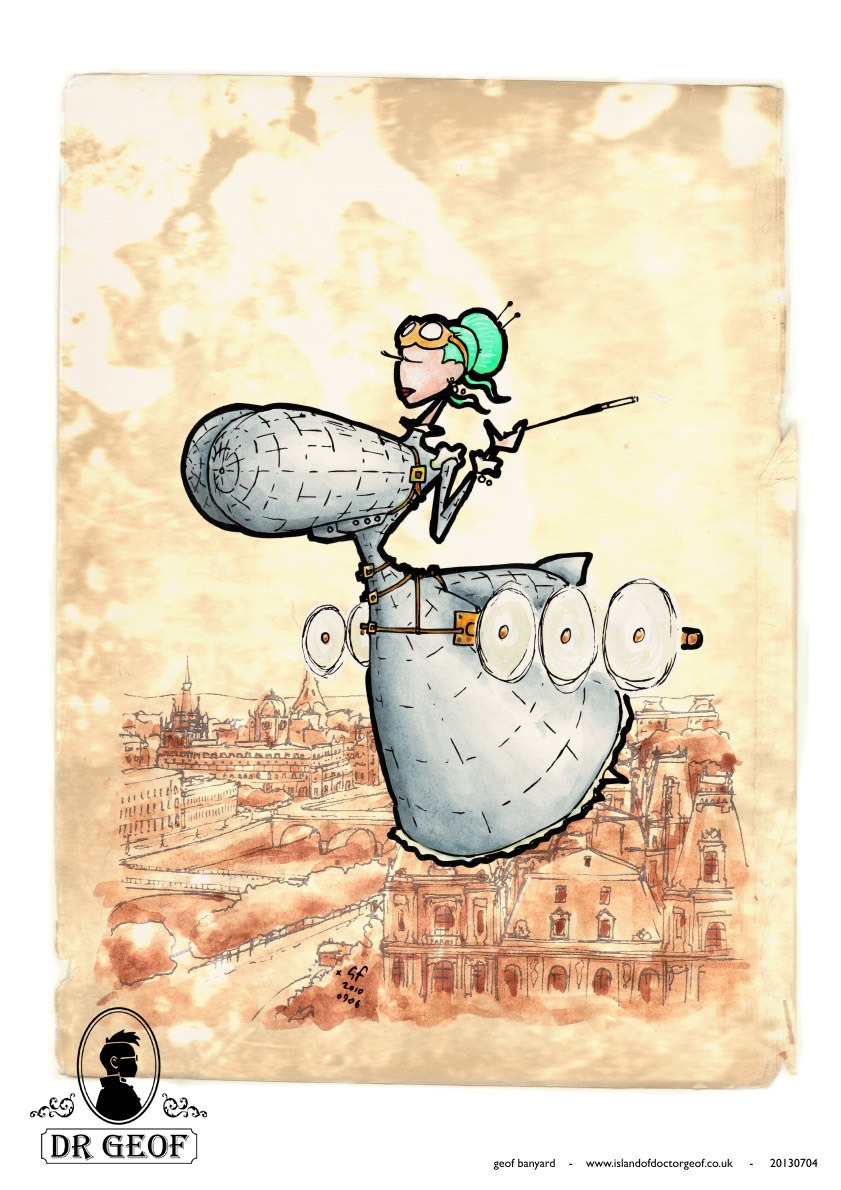 While I was in Lincoln for Weekend at the Asylum in September I got a chance to meet several of the Steampunk world’s writers and traders. During the run of Longitude Punk’d at the Royal Observatory, the Cutty Sark was also featuring a tea-riffic exhibit of Dr. Geoff’s printwork. And then at the markets for Asylum, I got a chance to meet that man himself selling his wares. We traded stickers and had a nice little chat, and I got to see more of his whimsical work. Most of his work has a military bent, while other pieces dabble in the risque, but for me that is the fun!
The good Doctor also offers a variety of Steampunk-inspired pins and patches to compliment his work on paper, and you can see what he has to offer on his website.


Tips for Makers: You Can Fake it When you Make it Part 3, “Plastic is Your Pal”

Plastic is an incredibly versatile material and it is everywhere. With a little ingenuity and elbow grease you can make it into just about anything.
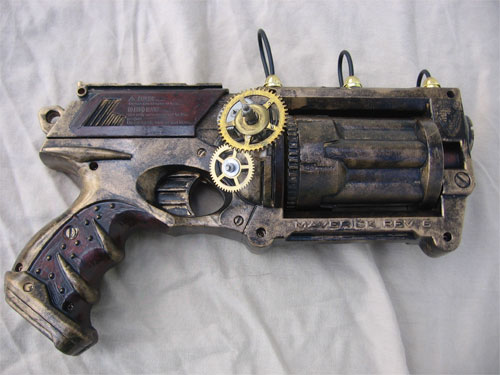 First off, there are toys. At any Steampunk cosplay event you can be sure you will see souped up Nerf guns and squirt guns that look like they walked right out of an H. G. Wells story. But keep in mind that if you want to paint a plastic gun that spray paint will chip over time. If you scour your plastic surface ahead of time with steel wool, sand paper or even a kitchen scouring pad you will create pores for the paint to adhere to and it will last much longer. Kinex is a line of plastic engineering toys so it is a great way to get lightweight and cheap plastic gears that you can paint to look like metal.
At the Form and Function session at The Asylum one of my favorite items was a remote-control Dalek toy that a maker Steampunked by adding metallic paint and little makeshift boiler on the back.

Major Quicksilver Power Glove
Plastic pipes like the ones you can find at the hardware store are also really useful. Just like plastic guns, they need to be roughed up before you paint them, but they are relatively easy to drill into with a small electric drill so they are easy to embellish. Major Quicksilver had an amazing “power glove” that he built by attaching a leather work glove to the interior so the fingers were flexible even though the gauntlet was rigid. It was enhanced by flexible plastic tubing and a leather strap that attaches to the upper arm.
You can also get the look of rivets without having to use real metal. If you search for “half pearls” on eBay you can find these great little half-spheres that look just like metal rivets, sometimes without having to paint them. The Major warns that you can find one with adhesive on the backs, but they are much more expensive than getting the kind you glue on yourself. And if you are attaching them to EVA foam hot glue will hold them on really well. An audience member also mentioned that dried peas or lentils can also do for rivets in a pinch, as long as you don’t mind a little irregularity in the shape.

Quicksilver flexible hand
Another great use for plastic is if you have to make something hinged. Sure, you can use real metal hinges that require screws but if you want a quick and easy hinge you can just cut plastic packaging like the top from a butter tub or the like into strips. Attach one end of each strip to the pieces you want to hinge and you will have a flexible and lightweight connection. The amazing giant hand at right had metal hinges on one side and plastic on the other. He was able to manipulate the fingers by pulling strings attached to a leather glove on the other side. In case you are thinking of doing something similar, he let us know that the thumb was the most difficult part to get to move, so he used his pinky finger instead, ergo the three-fingered hand.
The good Major also told the crowd all about a wonderful malleable plastic called polymorph. It comes in the form of little beads and you can melt them in boiling water on your stove. After they become gel-like and come together in a glob you have about 5 minutes to mold it into any shape you want. And if you don’t like the result you can just put it back into the hot water and start again. Of course, you have to be careful about burning yourself when you take the polymorph out, so if you use something like welders gloves it will protect your hands. It usually comes as a transparent plastic, but you can add dyes or paint it later. Once it is solid it is a great material to drill into or file.
If you want an antiqued look to your paint jobs you can use a dry brushing technique. This is done as the second layer to add a bit of a weathered look to your surfaces. For instance, if you are trying to get the look of copper armor that has begun to oxidize, you should start with a solid layer of copper paint before you add the touch of turquoise to make it look tarnished. To dry-brush, add a glob of paint to your brush (this is a good use for old brushes) and remove most of the paint on a newspaper, magazine, etc. Even if you remove most of the paint there will still be just a bit left on the bristles, and you can apply this to your finished project.
Do you have any suggestions for working with plastic? Please comment below!
For more tips about creatively cutting corners, you can check out parts 1 and 2 of this series.
Tips for Makers: You Can Fake it When you Make it Part 2, “Foam is Your Friend”


Quicksilver’s table-o-goodies
During the “Creating with Quicksilver” session, the Major couldn’t say enough good things about a material called Ethylene Vinyl Acetate (EVA) foam. My only experience with it has been with bedrolls and yoga mats, but he demonstrated several ways to use it when you are constructing costumes.
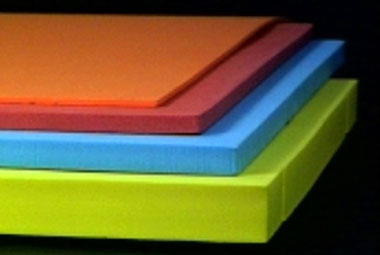 EVA foam comes and many different colors and thicknesses. There are floor mats that are popular for kids to play on and these often have texture on one side which can add interest. Unlike many plastics, this foam also readily takes to hot glue without extra treatment. It is easy to draw on it with permanent markers, and can be cut with scissors or for more accuracy, a craft knife. It will dull your blade pretty quickly, though, so if you plan to make repeated cuts it is a good idea to invest in a craft knife that allows you the change out the blade easily.
If you do end up with rough edges you have a couple options. You can use something like a Dremel or other electric tool to grind them down, but it will be very messy when the foam starts flying. Major Quicksilver advises running the blunt side of a scissors across any rough parts to smooth it down without the mess.
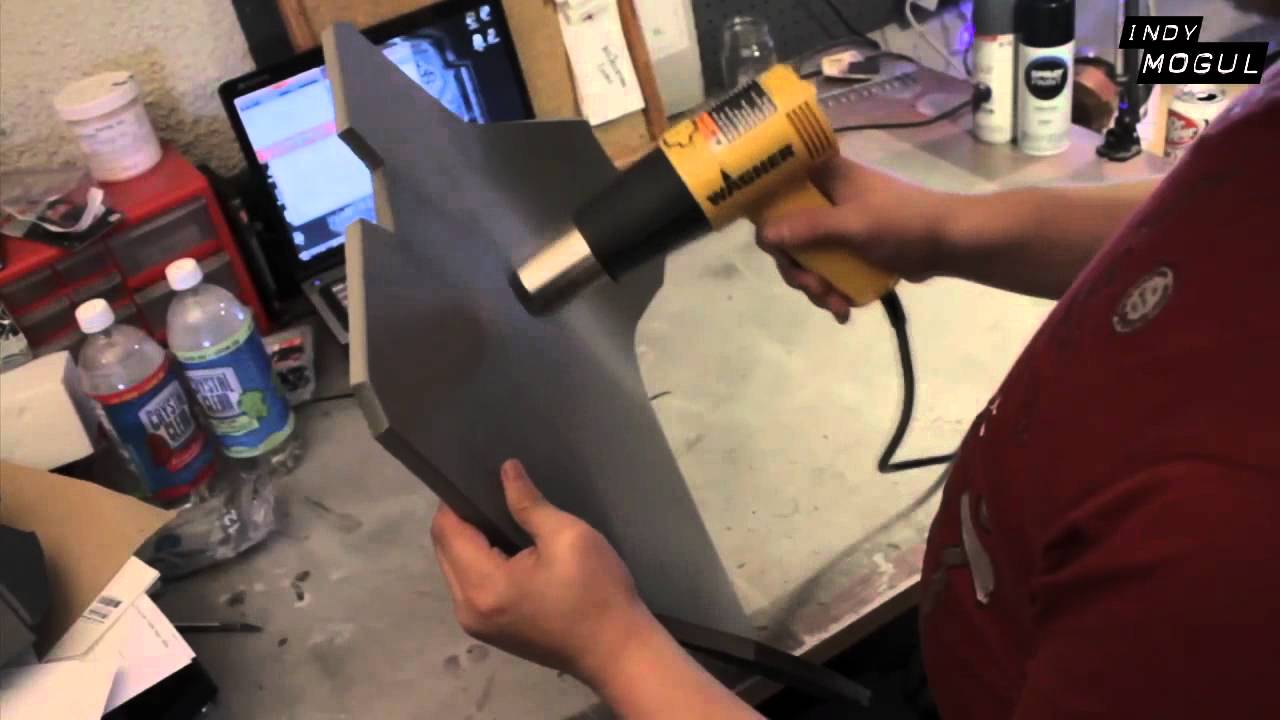 EVA is especially good for things like armor that need to look heavy and sturdy but you don’t want to weigh you down. There are tons of patterns out there on the web for different kinds of armor, and the foam is great for layering so you can add bulk to your character easily. It is also easy to mold when heated with a heat gun, or even a hairdryer and holds it shape like a dream.
There are some foams, like polystyrene, which are even lighter and readily available, but be advised that there is often a chemical reaction with certain paints that can actually melt the foam. It would be a shame to build a whole suit of armor just to have it disintegrate while you are adding the finishing touches! EVA, on the other hand, is great for painting, especially with spray paint. But beware that the more a part of your project has to bend the more likely it is that your paint job could crack and flake.
Here are a few Steampunk examples I found on the web to inspire your own creations.


")
