Steampunk User’s Manual Release

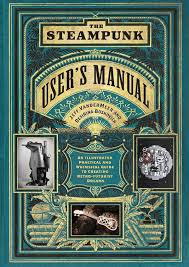 Jeff VanderMeer is a heavy-hitter on the Steampunk book scene, and, along with co-author Desirina Boskovich, he released a new book in October entitled The Steampunk User’s Manual: An Illustrated Practical and Whimsical Guide to Creating Retro-futurist Dreams.
“Steampunk, the retro-futuristic cultural movement, has become a substantial and permanent genre in the worlds of fantasy and science fiction. A large part of its appeal is that, at its core, Steampunk is about doing it yourself: building on the past while also innovating and creating something original. VanderMeer’s latest book offers practical and inspirational guidance for readers to find their individual path into this realm. Including sections on art, fashion, architecture, crafts, music, performance, and storytelling, The Steampunk User’s Manual provides a conceptual how-to guide that motivates and awes both the armchair enthusiast and the committed creator. Examples range from the utterly doable to the completely over-the-top, encouraging participation and imagination at all levels.” (From the Amazon page)
I have a copy of his Steampunk Bible, but along with several other volumes it had to be left behind in the US when I moved to Europe for the year. Luckily, I have family visiting in the Spring who will bring it to me, and maybe if I ask Santa really nicely he will leave the User’s Manual in my stocking this year.
Have you read anything by VanderMeer? Please share your thoughts below!
Tips for Makers: Taming Metal Part 3, “Torch and Scorch”

Even though it is strongly associated with the Industrial Revolution and the World Wars, welding has been around for thousands of years in one form or another. The Bronze Age (in Europe 3200-600 BCE) and the Iron Age (in Europe 800-51 BCE) were both eras shaped by the pounding, heating and joining of metals. But what happened in the Steam era were new techniques with fancy new power sources.
 For a long time, application of fire or hot coals was the only way to get metal to reach a high heat, and together with pressure (ie, hitting it with a hammer) with time and patience you could create weapons and other items that were made of metal fused together (this is called forge welding). But, at the beginning of the 19th century, the electric arc was discovered almost simultaneously in two different countries and shielded metal arc welding and its versatile tool the stick welder were born a short time later. An electric arc, in the simplest terms, is the shape that an electric current takes as it “jumps” from one point to another and ignites the gasses between those two points. This burning gas is hot enough to be considered plasma, which means that it burns extremely brightly, can throw off intense UV radiation, can create noxious fumes that you don’t want to inhale and is extremely likely to make your nice unmarred flesh resemble a roast suckling pig if it makes contact so BE CAREFUL.
During the Taming Metal session at Weekend at the Asylum the panelists didn’t get to spend too much time on any one method, but this was definitely Trevor Frank’s favorite. Stick welders are especially easy to use nowadays because of advancements that keep unwanted gasses from the air out, thus creating a more stable and predictable arc. You definitely must use a mask that covers the full face to protect your skin, eyes and lungs. Frank and others mentioned developing something they called “the welder’s nod” because of deploying their mask with a nod of the head. Plasma burns so bright that the eye part of a welding mask has to be so dark you cannot see what you are about to weld when you have your mask on. So the artist can lift their mask, get their pieces into position and right before they ignite the plasma they give a sharp nod of the head to bring the shield down. But masks have also been coming a long way, and there is now a type that darkens to eye shield the moment the arc is struck, thus saving your neck from all that nodding. There are many different kinds of welding, but for the non-professional, stick welding is a great method that their portability and relative ease of use.
There are some welding methods that use open (and extremely hot) flames in the form of torches. Personally, I have used a cutting torch to do some freehand sheet metal art, but I have never actually done welding myself. So in lieu of giving you bad information, I wanted to provide some links to resources instead.
Instructables- Metal Inert Gas (MIG) welding tutorial
Welding Tips and Tricks website
Tips for Makers: Taming Metal Part 2, “Treat and Heat”

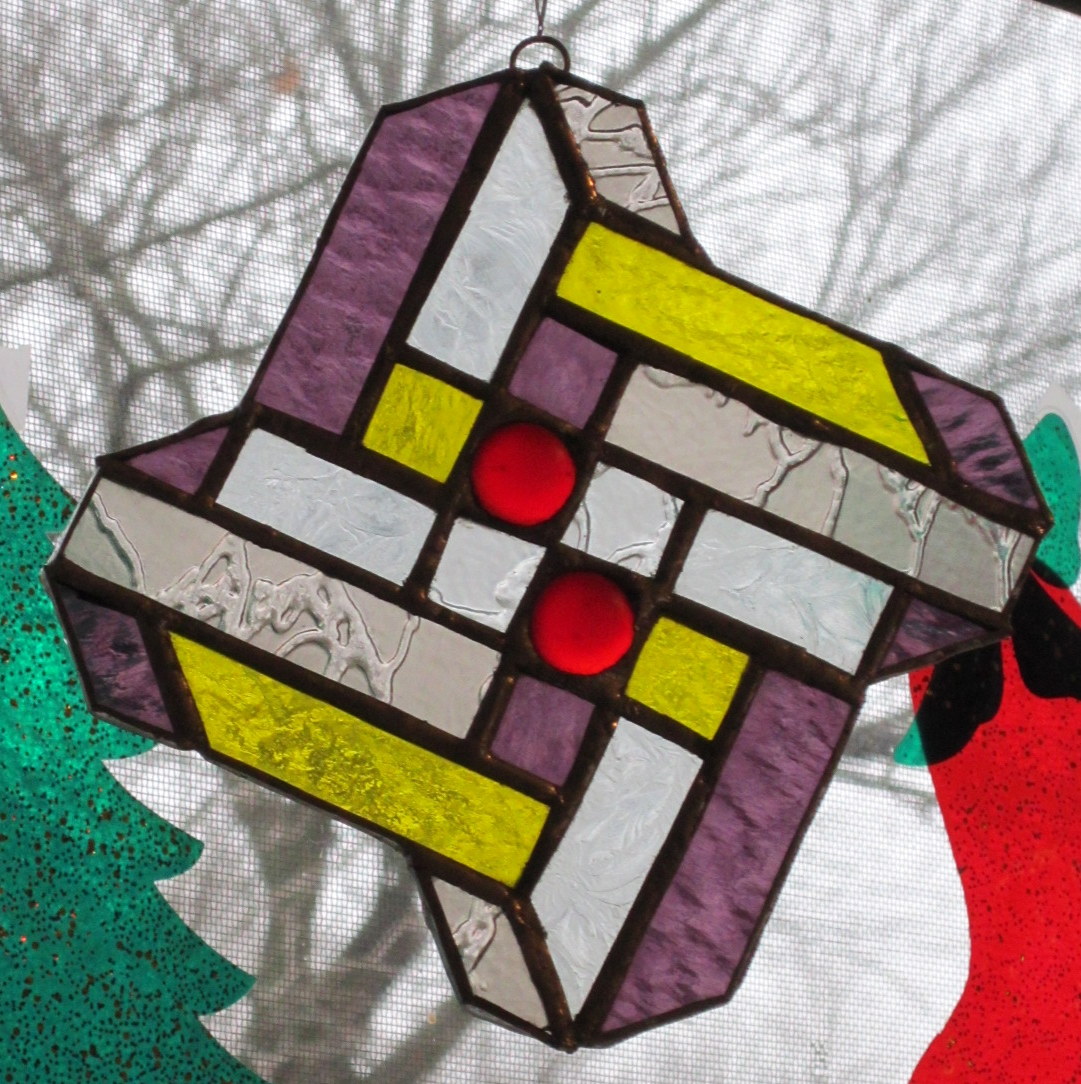
My favorite of the sun-catchers that I have made
Last time I covered some of the kinder, gentler ways to work with metal. In this post, I want to tell you about soldering. This is the metallurgical technique with which I have the most personal experience. I have used it to create silver jewelry and to attach transistors to electrical components like circuit boards, as well as making stained glass sun-catchers and sculptures.
Soldering
- Solder, a metal alloy used to join other metals together, comes in different varieties that have different melting temperatures, and your solder must always have a melting temperature lower than that of what you are joining.
- There is soft solder (melting between 190 to 840 °F) and hard solder (840 °F and above), which is sometimes called ‘silver solder‘. When working with high-temperature solder it is often referred to as ‘brazing.’ When a joint is particularly delicate (ie, joining two very small things or a small thing to a large thing) or the finished item is going to see a lot of wear and tear, it is better to use a harder solder and more acidic flux.
- In some cases, once your solder hardens it may actually be stronger than the materials you are joining. (This is also true of wood glue, by the way. It is usually easier to break the wood that you join than the place where it is joined.)
- Solder is often in the form of wire on a spool that is unwound and cut to the size needed for a particular joint. I have also used soldering solutions where tiny bits of solder are suspending in a liquid (see ‘flux’ below).
- There are two different kinds of tools you can use to melt your solder. A soldering iron is more or less shaped like a fat pen and is held as if you are writing. Be careful with this kind because once gets hot it stays hot as long as it is on. A soldering gun is shaped like a pistol and has a trigger that the artist presses to heat the tip each time. In both of these cases, the tip of the tool comes in direct contact with the solder and melts it so it can flow into the crack between whatever is being joined. When I making circuit boards, I used a hot air soldering iron that was held like a soldering iron but it had an open tip where air was heated and forced through, so the tip never came in contact with the solder itself. This was used with a very low temperature tin solder that has a high rate of conductivity which made it is ideal for electronics. Some hard solders may require a torch instead of an iron or gun.
- Before you can solder, you have to treat the joint with flux. This is a slightly acidic solution that takes away residue left from handling with bare hands, and it facilitates the solder’s flow into the joint. It is only mildly acidic, but if it gets into your eyes it can cause discomfort (trust me, I know from firsthand experience.)
- Safety: It is a good idea to wear gloves when soldering, especially if you are using a soldering iron which stays hot between joints. Stained glass soldering works at a low enough temperature that I have never gotten a blister from contact with the iron, but I have gotten sore, red fingers that last for a couple days. Keep in mind that the longer you have to apply the heat to the solder, the more the surrounding metal will also heat, so you can get burned if you are holding the materials you are joining with bare hands. Also, when flux heats it can sometimes spit like bacon grease in a frying pan, so if you may also want to wear goggles to keep the hot liquid from getting into your eyes.
Tips for Makers: Taming Metal Part 1, “Glues and Screws”
Friends, makers, cosplayers, lend me your ears! (Or eyes as the case would be) I attended several different sessions during my awesome convention experience in Lincoln, including three that were all about making the cool props, costumes, widgets and gadgets that can add that extra zing to your Steampunkery. This is the first installment of a multi-part tipfest for those of you who like to get your hands dirty just in time for Halloween.
I have taken many art classes in my time, and I was a fine arts major in college before I injured my drawing hand too badly to continue. I still minored in Art History though, and to qualify I took one of my favorite classes of all time, Intro to Sculpture. We worked with a variety of materials over the summer, but my absolute favorite was metal. I love it for two reasons: under the right conditions it is totally malleable, and when you are done it is incredibly strong. And shiny of course, let’s not forget shiny 🙂
 At Weekend at the Asylum there was a session called “Taming Metal” that was run by a panel consisting of “Herr Doktor“, Trevor Frank and “Dr Quack.” They started with the easiest way to join two metal pieces together and moved to the more involved techniques as the session went on, and they also touched on some important tools and safety tips, and etching advice. The following bullets are based on my notes that I took during the session.
- Metal can be joined in many ways ranging from “glues and screws” to welding. The stronger the joint you are looking for, the more sophisticated the equipment and the more safety precautions you need to take. There are serious safety concerns when working with torches, both for burns to your skin and to your retina which can result in temporary blindness and serious long-term effects on vision, so NEVER cut corners when it comes to safety. “Metal doesn’t care how old you are, or how experienced you are.”
-

Epoxy often looks like two syringes that are connected.
But let’s start with the easier stuff. Epoxy is more effective than other types of glue for adhering metal to other metal, or metal to other materials. And what is epoxy, you ask? It is usually a combination of two resins that are only mixed at the time you are using them and any extra must be disguarded, unlike glue that can sit on your shelf forever and more or less stays the same (though of course, glues to dry out over time).

- Any time you are going to use an adhesive rather an a screw, solder or welded connection make sure that you rough up your surface. The little scratches left behind by sand paper or steel wool will give your glue more to grip and create a better seal. And to give your glue its best shot, try to find a way to clamp or weigh down the connection point for at least a day or two while the adhesive sets. To preserve the look and texture of the metal while clamping, it is a good idea to put a cloth between your material and the shoes (or holdy-onny part of your clamp) or use a clamp with rubber covering the shoes.
-

A few shapes that nuts can take.
Nuts and bolts are a great way to hold metal together, but you will probably need to drill holes before you start. Dremels and other small, handheld drills can get through most thing sheets of metal, but watch out for shavings that can be sharp. But, it can be hard to find nuts and bolts that are the right color or type of metal (most are shiny, stainless steel like those at the right) to go with steampunk designs, so you may want to pre-rough them up if you are planning to add paint or use rivets instead.

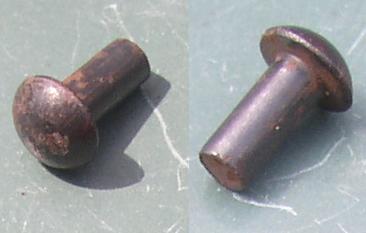
- Rivets are cool and very steampunk. Unlike screws and nuts n bolts, rivets are more or less meant to be permanent fasteners. The look a bit like a screw, but the shaft is smooth. The shaft is put through a pre-drilled (or pre-existing) hole and the tail end get smooshed to create a little barbell that holds your materials in place. If you like the look of rivets but don’t want to take the time or find the right tools for the job, I will give you some advice about how to fake rivets for cheap in my “Creating with Quicksilver” post next week.

Check out Part 2: “Treat and Heat”
Steampunk Stitchery from Urban Threads


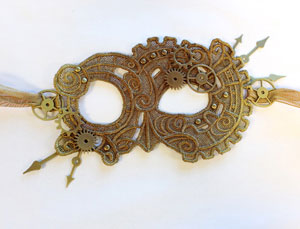
I was doing some Pinterest trawling for inspiration for a Steampunk mask and I ran across a tutorial for a beautiful Venetian-style lace mask at http://www.UrbanThreads.com (pictured above). I don’t have the equipment to machine stitch the lace myself, but I started to poke around the site and found a plethora of hand-stitchable design packs for as little as $4. You can check out the whole sets of hand-stitching designs here and machine-stitching designs here.
There are a variety of tutorials for DIY Steampunk on the site, many of which could be adapted for the non-embroiderer. Here are pics of some of my favorites, but you can find all of their tutorials here.


")


