Spotlight on Traders: Island of Dr. Geof

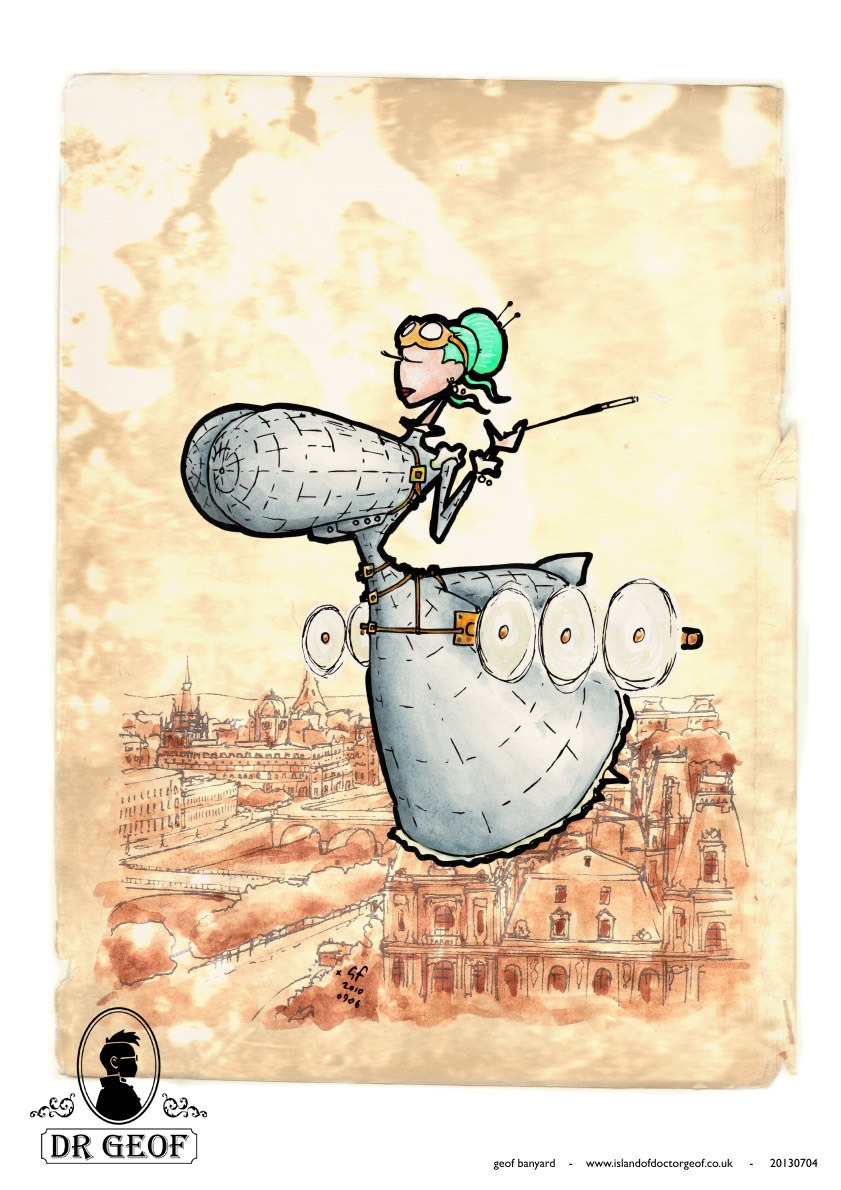 While I was in Lincoln for Weekend at the Asylum in September I got a chance to meet several of the Steampunk world’s writers and traders. During the run of Longitude Punk’d at the Royal Observatory, the Cutty Sark was also featuring a tea-riffic exhibit of Dr. Geoff’s printwork. And then at the markets for Asylum, I got a chance to meet that man himself selling his wares. We traded stickers and had a nice little chat, and I got to see more of his whimsical work. Most of his work has a military bent, while other pieces dabble in the risque, but for me that is the fun!
The good Doctor also offers a variety of Steampunk-inspired pins and patches to compliment his work on paper, and you can see what he has to offer on his website.


The Spitalfields Nippers
A link to a Daily Mail Online article about a set of photographs that were taken in the decades surrounding 1900 showing the heartbreaking state of the children of the poor inhabitants of Spitalfields in East London. The photographer was Horace Warner, a Quaker working in the East End to fight poverty and hunger. Some of his photographs were used to highlight the plight of the poor; most were stored away until now.
 Adelaide Springett was so ashamed of her tattered boots, she took them off for this 1901 photograph. Source: Daily Mail website (link above).
Those of us enamored by the Victorian Period or its revival movement, Steampunk, often forget that it was not all tea parties and polished brass doorknobs. Not everyone had a country manor or took the “Grand Tour” through Europe to finish one’s education. The orphanages and workhouses were full, and not with the happy…
View original post 47 more words
Tips for Makers: You Can Fake it When you Make it Part 3, “Plastic is Your Pal”

Plastic is an incredibly versatile material and it is everywhere. With a little ingenuity and elbow grease you can make it into just about anything.
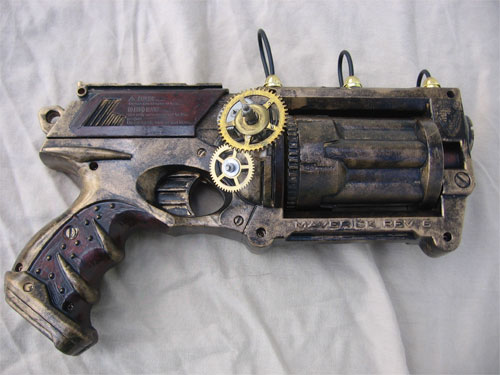 First off, there are toys. At any Steampunk cosplay event you can be sure you will see souped up Nerf guns and squirt guns that look like they walked right out of an H. G. Wells story. But keep in mind that if you want to paint a plastic gun that spray paint will chip over time. If you scour your plastic surface ahead of time with steel wool, sand paper or even a kitchen scouring pad you will create pores for the paint to adhere to and it will last much longer. Kinex is a line of plastic engineering toys so it is a great way to get lightweight and cheap plastic gears that you can paint to look like metal.
At the Form and Function session at The Asylum one of my favorite items was a remote-control Dalek toy that a maker Steampunked by adding metallic paint and little makeshift boiler on the back.

Major Quicksilver Power Glove
Plastic pipes like the ones you can find at the hardware store are also really useful. Just like plastic guns, they need to be roughed up before you paint them, but they are relatively easy to drill into with a small electric drill so they are easy to embellish. Major Quicksilver had an amazing “power glove” that he built by attaching a leather work glove to the interior so the fingers were flexible even though the gauntlet was rigid. It was enhanced by flexible plastic tubing and a leather strap that attaches to the upper arm.
You can also get the look of rivets without having to use real metal. If you search for “half pearls” on eBay you can find these great little half-spheres that look just like metal rivets, sometimes without having to paint them. The Major warns that you can find one with adhesive on the backs, but they are much more expensive than getting the kind you glue on yourself. And if you are attaching them to EVA foam hot glue will hold them on really well. An audience member also mentioned that dried peas or lentils can also do for rivets in a pinch, as long as you don’t mind a little irregularity in the shape.

Quicksilver flexible hand
Another great use for plastic is if you have to make something hinged. Sure, you can use real metal hinges that require screws but if you want a quick and easy hinge you can just cut plastic packaging like the top from a butter tub or the like into strips. Attach one end of each strip to the pieces you want to hinge and you will have a flexible and lightweight connection. The amazing giant hand at right had metal hinges on one side and plastic on the other. He was able to manipulate the fingers by pulling strings attached to a leather glove on the other side. In case you are thinking of doing something similar, he let us know that the thumb was the most difficult part to get to move, so he used his pinky finger instead, ergo the three-fingered hand.
The good Major also told the crowd all about a wonderful malleable plastic called polymorph. It comes in the form of little beads and you can melt them in boiling water on your stove. After they become gel-like and come together in a glob you have about 5 minutes to mold it into any shape you want. And if you don’t like the result you can just put it back into the hot water and start again. Of course, you have to be careful about burning yourself when you take the polymorph out, so if you use something like welders gloves it will protect your hands. It usually comes as a transparent plastic, but you can add dyes or paint it later. Once it is solid it is a great material to drill into or file.
If you want an antiqued look to your paint jobs you can use a dry brushing technique. This is done as the second layer to add a bit of a weathered look to your surfaces. For instance, if you are trying to get the look of copper armor that has begun to oxidize, you should start with a solid layer of copper paint before you add the touch of turquoise to make it look tarnished. To dry-brush, add a glob of paint to your brush (this is a good use for old brushes) and remove most of the paint on a newspaper, magazine, etc. Even if you remove most of the paint there will still be just a bit left on the bristles, and you can apply this to your finished project.
Do you have any suggestions for working with plastic? Please comment below!
For more tips about creatively cutting corners, you can check out parts 1 and 2 of this series.
Tips for Makers: You Can Fake it When you Make it Part 2, “Foam is Your Friend”


Quicksilver’s table-o-goodies
During the “Creating with Quicksilver” session, the Major couldn’t say enough good things about a material called Ethylene Vinyl Acetate (EVA) foam. My only experience with it has been with bedrolls and yoga mats, but he demonstrated several ways to use it when you are constructing costumes.
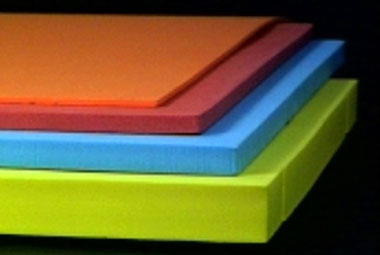 EVA foam comes and many different colors and thicknesses. There are floor mats that are popular for kids to play on and these often have texture on one side which can add interest. Unlike many plastics, this foam also readily takes to hot glue without extra treatment. It is easy to draw on it with permanent markers, and can be cut with scissors or for more accuracy, a craft knife. It will dull your blade pretty quickly, though, so if you plan to make repeated cuts it is a good idea to invest in a craft knife that allows you the change out the blade easily.
If you do end up with rough edges you have a couple options. You can use something like a Dremel or other electric tool to grind them down, but it will be very messy when the foam starts flying. Major Quicksilver advises running the blunt side of a scissors across any rough parts to smooth it down without the mess.
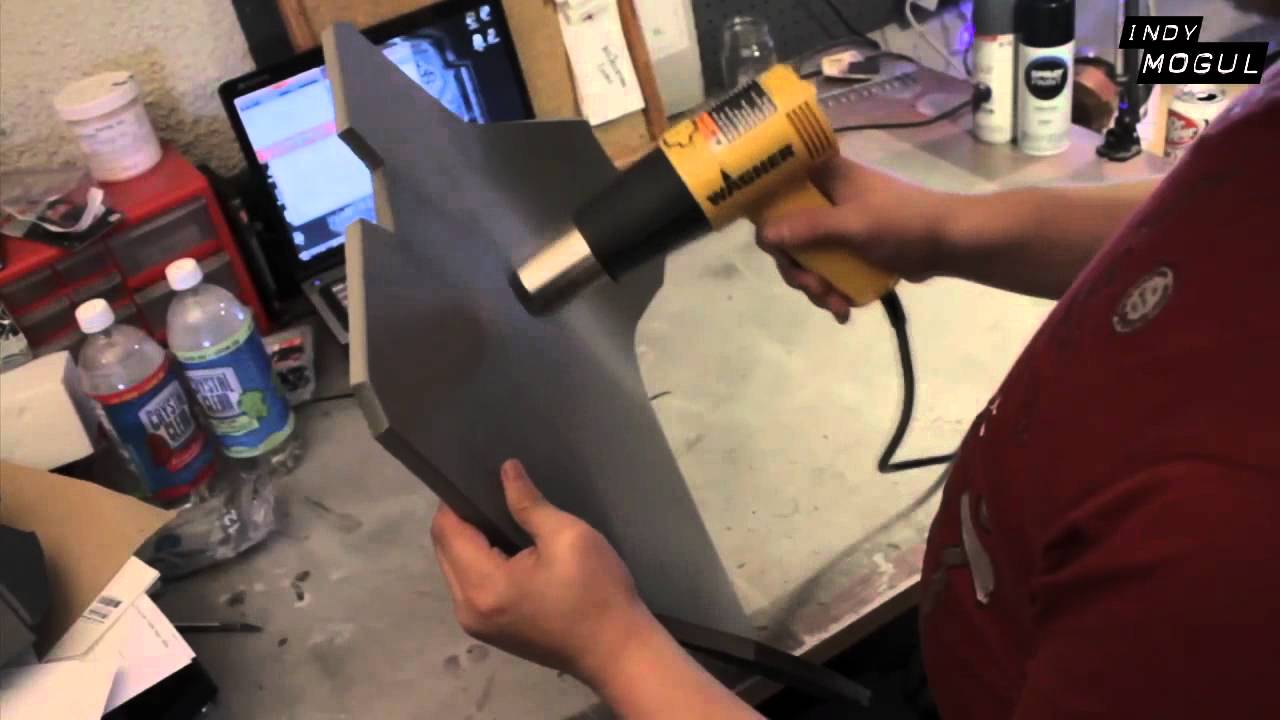 EVA is especially good for things like armor that need to look heavy and sturdy but you don’t want to weigh you down. There are tons of patterns out there on the web for different kinds of armor, and the foam is great for layering so you can add bulk to your character easily. It is also easy to mold when heated with a heat gun, or even a hairdryer and holds it shape like a dream.
There are some foams, like polystyrene, which are even lighter and readily available, but be advised that there is often a chemical reaction with certain paints that can actually melt the foam. It would be a shame to build a whole suit of armor just to have it disintegrate while you are adding the finishing touches! EVA, on the other hand, is great for painting, especially with spray paint. But beware that the more a part of your project has to bend the more likely it is that your paint job could crack and flake.
Here are a few Steampunk examples I found on the web to inspire your own creations.


Tips for Makers: Taming Metal Part 3, “Torch and Scorch”

Even though it is strongly associated with the Industrial Revolution and the World Wars, welding has been around for thousands of years in one form or another. The Bronze Age (in Europe 3200-600 BCE) and the Iron Age (in Europe 800-51 BCE) were both eras shaped by the pounding, heating and joining of metals. But what happened in the Steam era were new techniques with fancy new power sources.
 For a long time, application of fire or hot coals was the only way to get metal to reach a high heat, and together with pressure (ie, hitting it with a hammer) with time and patience you could create weapons and other items that were made of metal fused together (this is called forge welding). But, at the beginning of the 19th century, the electric arc was discovered almost simultaneously in two different countries and shielded metal arc welding and its versatile tool the stick welder were born a short time later. An electric arc, in the simplest terms, is the shape that an electric current takes as it “jumps” from one point to another and ignites the gasses between those two points. This burning gas is hot enough to be considered plasma, which means that it burns extremely brightly, can throw off intense UV radiation, can create noxious fumes that you don’t want to inhale and is extremely likely to make your nice unmarred flesh resemble a roast suckling pig if it makes contact so BE CAREFUL.
During the Taming Metal session at Weekend at the Asylum the panelists didn’t get to spend too much time on any one method, but this was definitely Trevor Frank’s favorite. Stick welders are especially easy to use nowadays because of advancements that keep unwanted gasses from the air out, thus creating a more stable and predictable arc. You definitely must use a mask that covers the full face to protect your skin, eyes and lungs. Frank and others mentioned developing something they called “the welder’s nod” because of deploying their mask with a nod of the head. Plasma burns so bright that the eye part of a welding mask has to be so dark you cannot see what you are about to weld when you have your mask on. So the artist can lift their mask, get their pieces into position and right before they ignite the plasma they give a sharp nod of the head to bring the shield down. But masks have also been coming a long way, and there is now a type that darkens to eye shield the moment the arc is struck, thus saving your neck from all that nodding. There are many different kinds of welding, but for the non-professional, stick welding is a great method that their portability and relative ease of use.
There are some welding methods that use open (and extremely hot) flames in the form of torches. Personally, I have used a cutting torch to do some freehand sheet metal art, but I have never actually done welding myself. So in lieu of giving you bad information, I wanted to provide some links to resources instead.
Instructables- Metal Inert Gas (MIG) welding tutorial
Welding Tips and Tricks website
Tips for Makers: Taming Metal Part 2, “Treat and Heat”

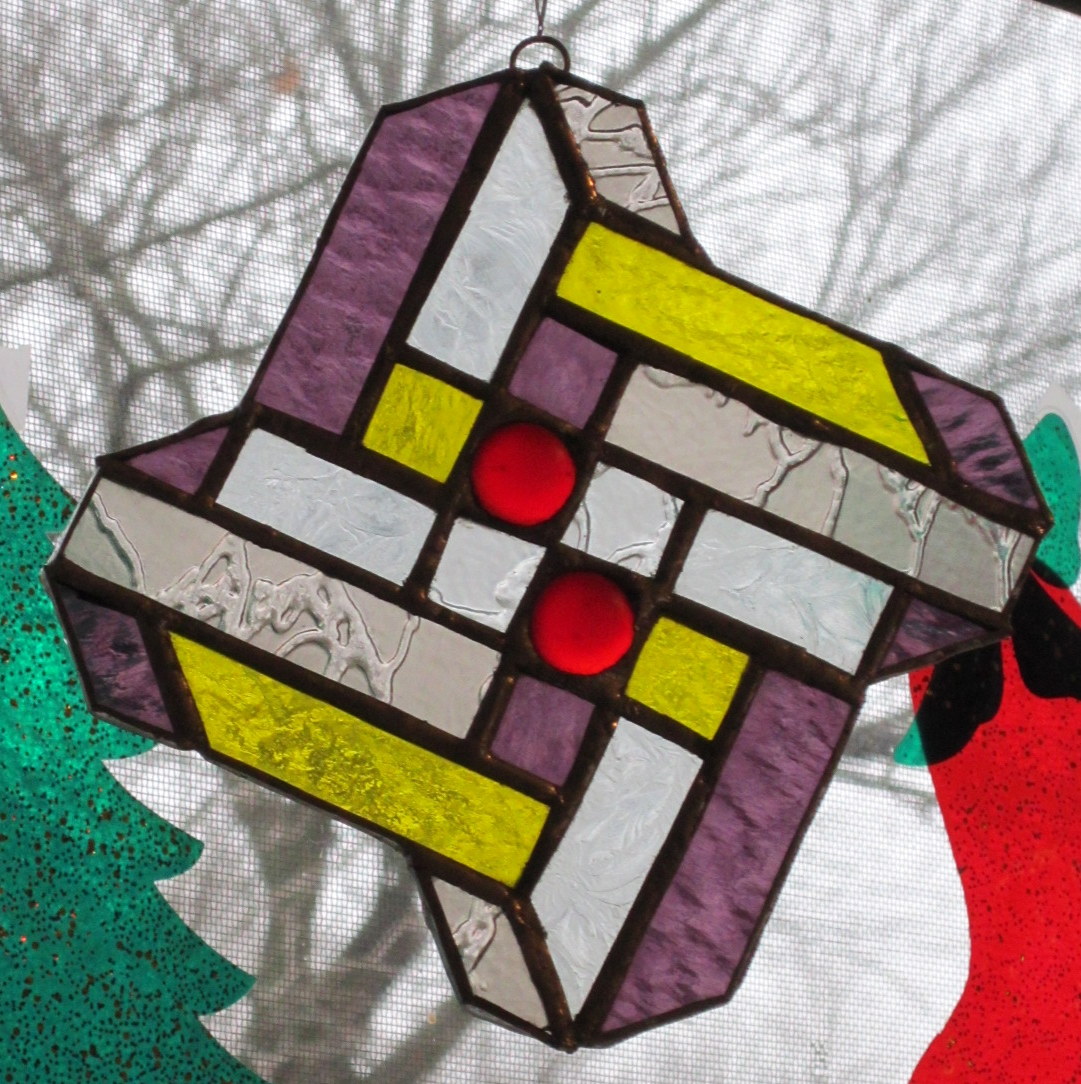
My favorite of the sun-catchers that I have made
Last time I covered some of the kinder, gentler ways to work with metal. In this post, I want to tell you about soldering. This is the metallurgical technique with which I have the most personal experience. I have used it to create silver jewelry and to attach transistors to electrical components like circuit boards, as well as making stained glass sun-catchers and sculptures.
Soldering
- Solder, a metal alloy used to join other metals together, comes in different varieties that have different melting temperatures, and your solder must always have a melting temperature lower than that of what you are joining.
- There is soft solder (melting between 190 to 840 °F) and hard solder (840 °F and above), which is sometimes called ‘silver solder‘. When working with high-temperature solder it is often referred to as ‘brazing.’ When a joint is particularly delicate (ie, joining two very small things or a small thing to a large thing) or the finished item is going to see a lot of wear and tear, it is better to use a harder solder and more acidic flux.
- In some cases, once your solder hardens it may actually be stronger than the materials you are joining. (This is also true of wood glue, by the way. It is usually easier to break the wood that you join than the place where it is joined.)
- Solder is often in the form of wire on a spool that is unwound and cut to the size needed for a particular joint. I have also used soldering solutions where tiny bits of solder are suspending in a liquid (see ‘flux’ below).
- There are two different kinds of tools you can use to melt your solder. A soldering iron is more or less shaped like a fat pen and is held as if you are writing. Be careful with this kind because once gets hot it stays hot as long as it is on. A soldering gun is shaped like a pistol and has a trigger that the artist presses to heat the tip each time. In both of these cases, the tip of the tool comes in direct contact with the solder and melts it so it can flow into the crack between whatever is being joined. When I making circuit boards, I used a hot air soldering iron that was held like a soldering iron but it had an open tip where air was heated and forced through, so the tip never came in contact with the solder itself. This was used with a very low temperature tin solder that has a high rate of conductivity which made it is ideal for electronics. Some hard solders may require a torch instead of an iron or gun.
- Before you can solder, you have to treat the joint with flux. This is a slightly acidic solution that takes away residue left from handling with bare hands, and it facilitates the solder’s flow into the joint. It is only mildly acidic, but if it gets into your eyes it can cause discomfort (trust me, I know from firsthand experience.)
- Safety: It is a good idea to wear gloves when soldering, especially if you are using a soldering iron which stays hot between joints. Stained glass soldering works at a low enough temperature that I have never gotten a blister from contact with the iron, but I have gotten sore, red fingers that last for a couple days. Keep in mind that the longer you have to apply the heat to the solder, the more the surrounding metal will also heat, so you can get burned if you are holding the materials you are joining with bare hands. Also, when flux heats it can sometimes spit like bacon grease in a frying pan, so if you may also want to wear goggles to keep the hot liquid from getting into your eyes.
Tips for Makers: Taming Metal Part 1, “Glues and Screws”
Friends, makers, cosplayers, lend me your ears! (Or eyes as the case would be) I attended several different sessions during my awesome convention experience in Lincoln, including three that were all about making the cool props, costumes, widgets and gadgets that can add that extra zing to your Steampunkery. This is the first installment of a multi-part tipfest for those of you who like to get your hands dirty just in time for Halloween.
I have taken many art classes in my time, and I was a fine arts major in college before I injured my drawing hand too badly to continue. I still minored in Art History though, and to qualify I took one of my favorite classes of all time, Intro to Sculpture. We worked with a variety of materials over the summer, but my absolute favorite was metal. I love it for two reasons: under the right conditions it is totally malleable, and when you are done it is incredibly strong. And shiny of course, let’s not forget shiny 🙂
 At Weekend at the Asylum there was a session called “Taming Metal” that was run by a panel consisting of “Herr Doktor“, Trevor Frank and “Dr Quack.” They started with the easiest way to join two metal pieces together and moved to the more involved techniques as the session went on, and they also touched on some important tools and safety tips, and etching advice. The following bullets are based on my notes that I took during the session.
- Metal can be joined in many ways ranging from “glues and screws” to welding. The stronger the joint you are looking for, the more sophisticated the equipment and the more safety precautions you need to take. There are serious safety concerns when working with torches, both for burns to your skin and to your retina which can result in temporary blindness and serious long-term effects on vision, so NEVER cut corners when it comes to safety. “Metal doesn’t care how old you are, or how experienced you are.”
-

Epoxy often looks like two syringes that are connected.
But let’s start with the easier stuff. Epoxy is more effective than other types of glue for adhering metal to other metal, or metal to other materials. And what is epoxy, you ask? It is usually a combination of two resins that are only mixed at the time you are using them and any extra must be disguarded, unlike glue that can sit on your shelf forever and more or less stays the same (though of course, glues to dry out over time).

- Any time you are going to use an adhesive rather an a screw, solder or welded connection make sure that you rough up your surface. The little scratches left behind by sand paper or steel wool will give your glue more to grip and create a better seal. And to give your glue its best shot, try to find a way to clamp or weigh down the connection point for at least a day or two while the adhesive sets. To preserve the look and texture of the metal while clamping, it is a good idea to put a cloth between your material and the shoes (or holdy-onny part of your clamp) or use a clamp with rubber covering the shoes.
-

A few shapes that nuts can take.
Nuts and bolts are a great way to hold metal together, but you will probably need to drill holes before you start. Dremels and other small, handheld drills can get through most thing sheets of metal, but watch out for shavings that can be sharp. But, it can be hard to find nuts and bolts that are the right color or type of metal (most are shiny, stainless steel like those at the right) to go with steampunk designs, so you may want to pre-rough them up if you are planning to add paint or use rivets instead.

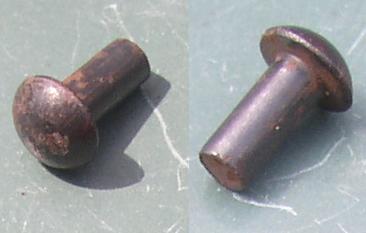
- Rivets are cool and very steampunk. Unlike screws and nuts n bolts, rivets are more or less meant to be permanent fasteners. The look a bit like a screw, but the shaft is smooth. The shaft is put through a pre-drilled (or pre-existing) hole and the tail end get smooshed to create a little barbell that holds your materials in place. If you like the look of rivets but don’t want to take the time or find the right tools for the job, I will give you some advice about how to fake rivets for cheap in my “Creating with Quicksilver” post next week.

Check out Part 2: “Treat and Heat”
The Victoria and Albert Museum Part 3: International Exhibitions

The site of the Victoria and Albert Museum was purchased largely through the proceeds from the Great Exhibition of 1851, which was the first international exhibition of its time, though not the last. Many of the wonderful items showcased at these types exhibitions that were held all over Europe during the 19th and 20th centuries eventually found a home at the museum and are still on display today. When walking through the exhibit halls I felt like I was on a scavenger hunt looking for these pieces of history which were seen by millions of people during the course of exhibition and are still breathtakingly beautiful to behold over 160 years later. One of the appeals for me about Steampunk and the era that gave rise to the aesthetic is the emphasis on craftsmanship, and there is no shortage of that at the V&A. Here are two pieces of the most impressive pieces that I encountered during my visit.


This “cathedral in wood” was a gift from the Austrian Emperor, Franz Ferdinand, to Queen Victoria. According to the museum label, it’s decoration reflected the debate about the unification of all German-speaking peoples under one rule. The bookcase had to be at least 20 feet tall, which means it just might hold the entire literary collection of one Steampunk fan 🙂 In the center there is a Belgian altarpiece on display that looked like it had been carved out of the most delicious dark chocolate, but it was also made of wood. These two pieces were not originally shown together, but they both made cameos at the Great Exhibition. The altarpiece reflects the revival of the Gothic style that is often seen in Steampunk works, and makes it a lovely addition to the imposing bookcase.


This symphony in metal is called the Hereford screen, and was on display at the International Exhibition of 1862. Like the altarpiece above, this was a way of harkening back to the Gothic era when churches employed magnificent screens like this one. The choir would stand behind large and ornately carved wooden screens, but this one was intended to showcase new advances in metal-working techniques as much as celebrate the Gothic style. There are several figures on the screen, which is over 10 meters high. The figures could very well have been cast in bronze, but instead were created by using newly-discovered electroplating technology that employed plaster molds and electricity to bend copper to the artist’s will. This is truly an example of old-meets-new in the Victorian era, so it definitely piqued my Steampunk interest.
Have you spotted any pieces of the Great Exhibition or the International Exhibition in London? Please share!


")


